Image gallery
To create an image gallery, use the "Text & Media" element with multiple images (at least 2) and the "Enlarge on click" feature.
Prepare images for the website
Images must be prepared before uploading them to the website:
- Do not upload images directly from the camera to the website or the website's file system.
- Edit the images in advance using image editing software (e.g., Photoshop):
- Change the file names.
- Reduce the image size to the dimensions in which they will be displayed on the website.
- Use only image file formats such as jpg/jpeg, gif, png, svg, or webp.
- Ensure that images have the same width and height if they are to be inserted into the same content element before uploading them to the website's file list.
- For layouts with a right column, the maximum width for images is 936 pixels; for layouts without a right column, the maximum width is 1176 pixels.
Create content element "Text&Media"
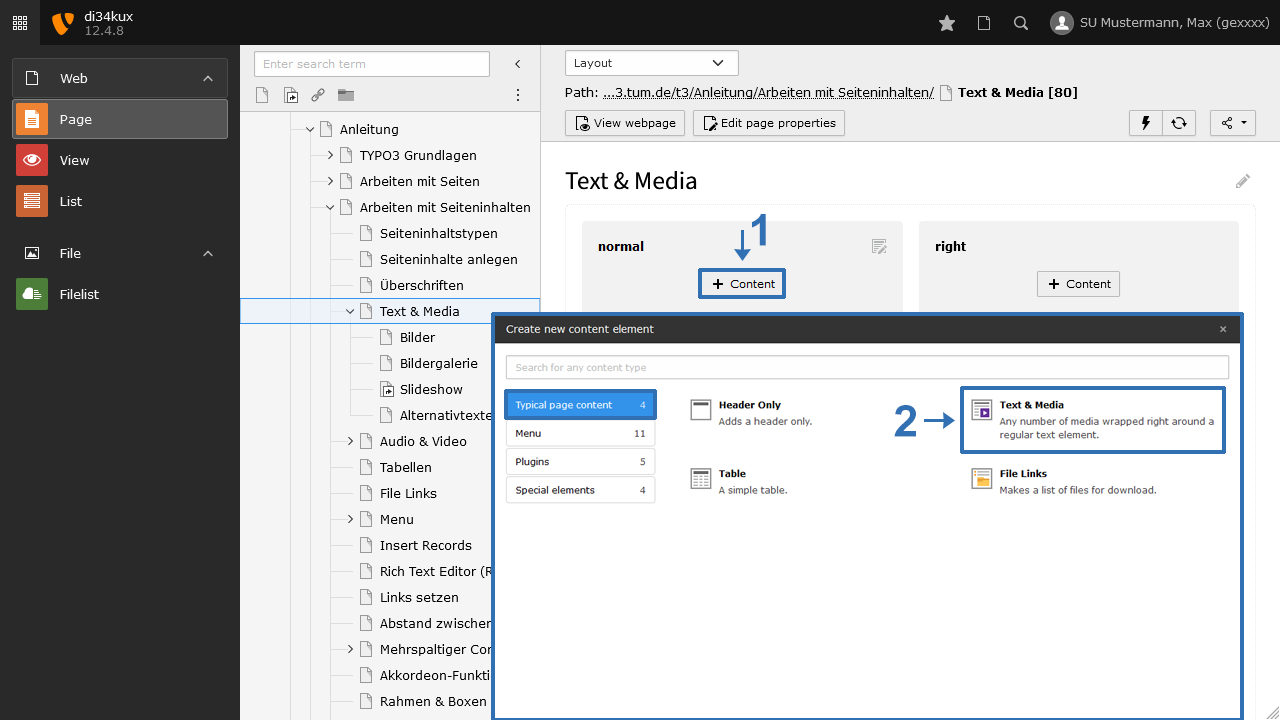
To insert media elements (images, video, audio) into a content element, select “Text & Media”.
Insert images
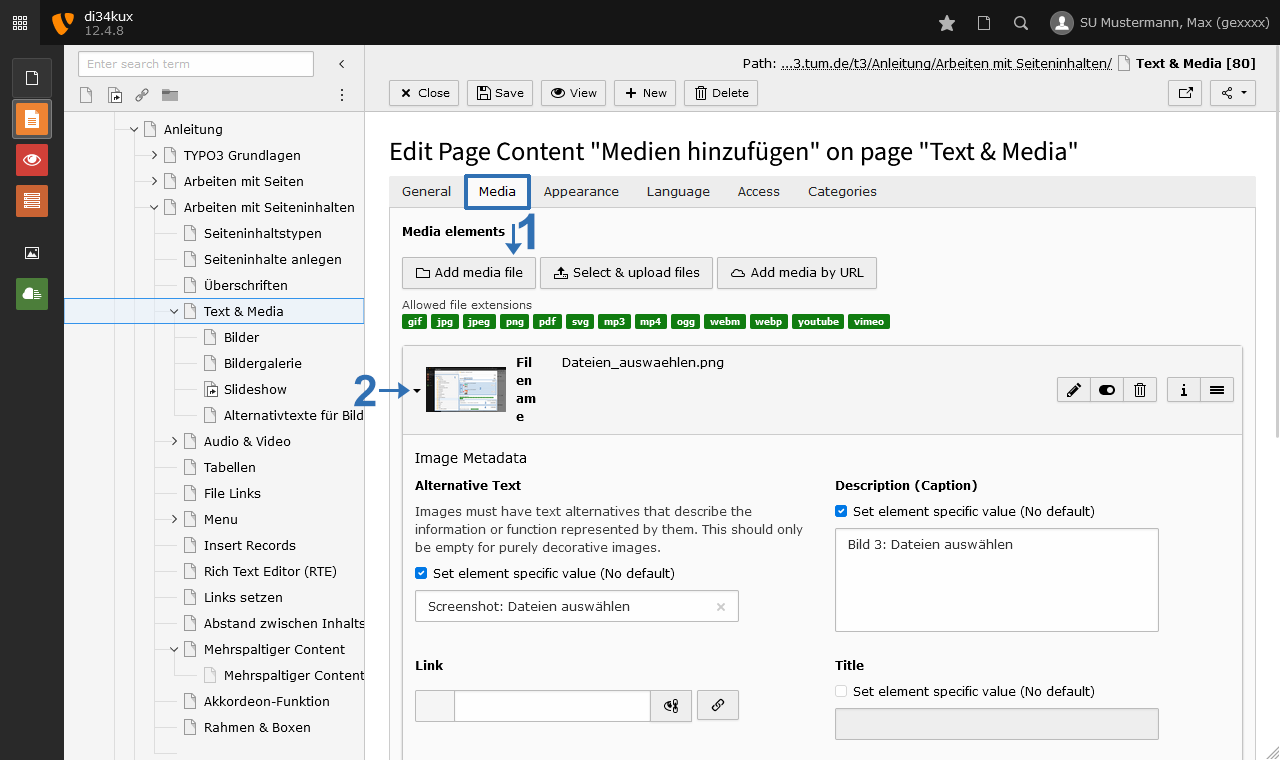
- Click on the Media tab and select Add media file (Image 2 No.1). The file list will open in a pop-up window.
- You can now add one or more images to the content element.
- You can edit the image metadata by clicking on the respective image in the backend (Image 2 No.2).
Display options Image gallery
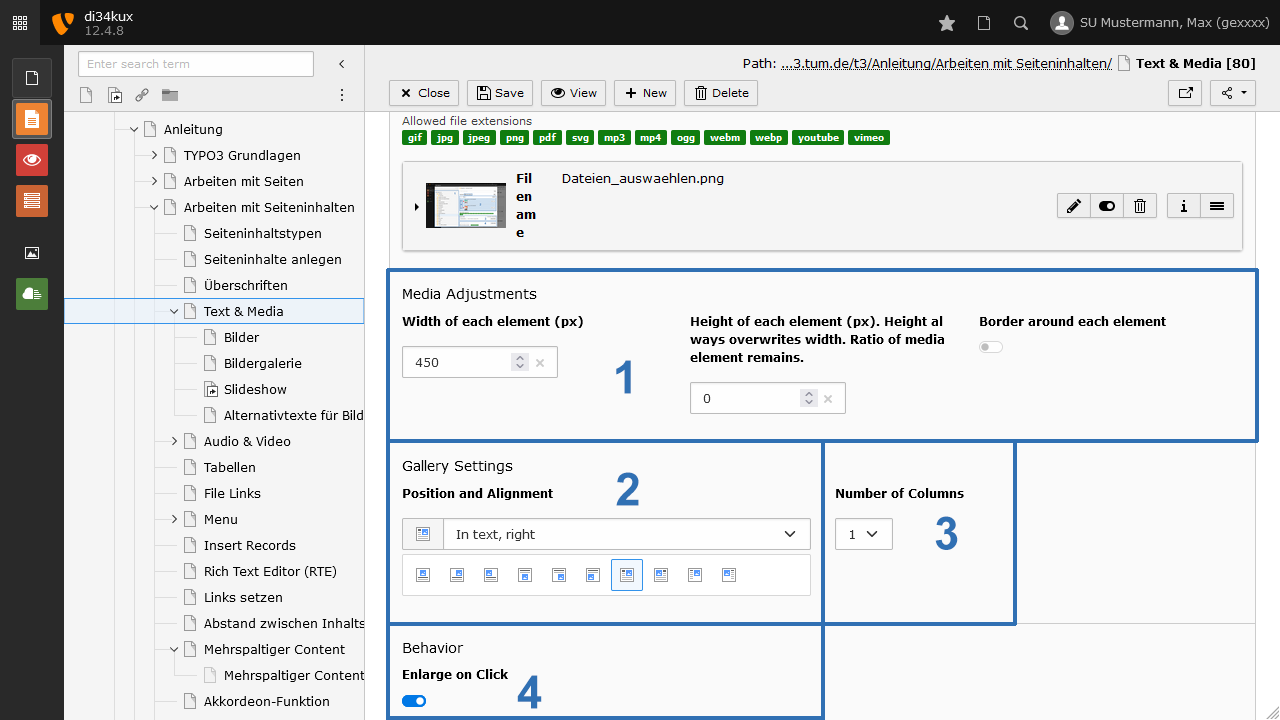
- Set the size of the thumbnails (Image 3 No.1). Enter either the height or the width. Please enter only one value!
- Activate the Enlarge on Click option (Image 3 No.4).
- With Number of Columns (Image 3 No.3), you can control how many thumbnails are displayed side by side.